A perfectly cooked beef shoulder roast can turn any dinner into a special family event. Its rich flavors and tender texture are the essence of home cooking. I remember my grandmother’s tender beef roast recipes bringing us all together.
Finding the right beef shoulder roast is an art that can boost your cooking skills. This recipe is for both seasoned cooks and beginners. It shows you how to make a dish that will wow even the pickiest eaters.
The key is knowing the cut, preparing it well, and cooking it just right. With some expert tips, you can make a meal that rivals any restaurant. Your family will be asking for more.
Table of Contents
Understanding Beef Shoulder Roast Cuts
Choosing the right beef shoulder roast is key to a tasty dish. Each cut has its own traits that affect how you cook it and the dish’s quality.

Different Types of Shoulder Cuts
Knowing the various cuts is vital when cooking beef shoulder. The main cuts are:
- Chuck Roast: Most popular for its rich marbling and flavor
- Arm Roast: Leaner cut with moderate tenderness
- Blade Roast: Slightly more tender with good fat content
- Bottom Round: Leanest option requiring longer cooking
Marbling and Fat Content
Fat content is key in your beef shoulder roast recipe. More marbling means more flavor and tenderness.
| Cut | Marbling Level | Recommended Cooking Method |
|---|---|---|
| Chuck Roast | High | Slow braising |
| Arm Roast | Medium | Slow cooking or pot roasting |
| Bottom Round | Low | Long, moist cooking techniques |
Choosing the Perfect Cut
When picking your beef shoulder, look for consistent marbling, bright red color, and firm texture. Your choice greatly affects your dish’s success.
Essential Ingredients and Equipment

Making the perfect beef shoulder roast recipe begins with top-notch ingredients and the right tools. Your dutch oven beef shoulder dish needs special care and the right parts to make it stand out.
For a top-notch beef shoulder roast, you’ll need a few key ingredients:
- Beef chuck roast (3-4 pounds, well-marbled)
- Premium olive oil
- Fresh vegetables:
- Onions
- Carrots
- Garlic cloves
- Liquid ingredients:
- Beef stock
- Red wine
- Seasonings:
- Kosher salt
- Freshly ground black pepper
- Fresh herbs (thyme and rosemary)
Your dutch oven beef shoulder needs special equipment for the best results. A heavy-bottomed Dutch oven is key for even heat and deep flavors. Cast iron models are best for their heat retention and slow-cooking perfection.
Professional chefs suggest getting quality tools like:
- Large Dutch oven
- Sharp chef’s knife
- Meat thermometer
- Cutting board
- Tongs for handling meat
With these ingredients and tools, you’re set to make a delicious beef shoulder roast. It will wow your family and guests.
Preparing Your Beef Shoulder Roast Recipe
Starting an easy beef shoulder dinner requires careful prep. The right steps can turn a simple roast into a memorable meal. It will surely impress your family and guests.
Seasoning Techniques
Seasoning is key for deep flavor in your beef roast marinade. Begin by covering the meat with kosher salt and freshly ground black pepper. The salt breaks down muscle fibers, making the roast tender.
- Use coarse kosher salt for better coverage
- Grind black pepper directly onto the meat for maximum freshness
- Consider adding dried herbs like thyme or rosemary
Marinade Options
A great beef roast marinade can make your dish stand out. Here are some flavor-packed options:
| Marinade Type | Key Ingredients | Marinating Time |
|---|---|---|
| Red Wine Marinade | Red wine, garlic, rosemary | 4-8 hours |
| Balsamic Marinade | Balsamic vinegar, olive oil, herbs | 2-4 hours |
| Soy-Ginger Marinade | Soy sauce, ginger, garlic | 3-6 hours |
Pre-cooking Tips
Preparing your beef shoulder roast needs attention to detail. Always remove the meat from the refrigerator 30-45 minutes before cooking. This ensures even cooking and a tender result.
- Pat the meat dry with paper towels
- Let it rest at room temperature
- Trim excess fat if necessary
- Bring all ingredients to room temperature
By following these steps, you’ll make an easy beef shoulder dinner that’s both tasty and impressive.
The Perfect Searing Method
Mastering the best beef shoulder cooking method starts with a key step: searing. This technique turns your beef shoulder into something special. It creates a rich, golden-brown crust that keeps in amazing flavor.
Searing is your secret weapon when cooking beef shoulder. It uses high heat to caramelize the meat’s surface. This creates deep, complex flavors through a chemical reaction called the Maillard effect.
- Choose a heavy-bottomed cast-iron skillet or Dutch oven
- Pat the beef shoulder dry with paper towels
- Season generously with kosher salt and black pepper
- Use high smoke-point oils like avocado or grapeseed
Searing needs precise temperature control. Heat your pan until it’s almost smoking. Add a thin layer of oil and carefully place the beef shoulder in the pan. Let each side get a deep golden-brown crust, usually 1-2 minutes per side.
| Searing Stage | Temperature | Time |
|---|---|---|
| Pan Preheating | Medium-High | 3-4 minutes |
| First Side Sear | High | 1-2 minutes |
| Subsequent Sides | High | 1 minute each |
Don’t overcrowd the pan, as it can lower the temperature and prevent proper browning. Your goal is a beautiful, crusty exterior. This seals in the meat’s natural juices, preparing it for a perfectly cooked beef shoulder roast.
Dutch Oven Braising Technique
Learning to cook a dutch oven beef shoulder is all about braising. This method turns tough cuts into tender, juicy pieces. It uses low heat and the right amount of liquid.
Temperature Control for Tender Results
To get tender beef shoulder, you need to control the temperature. Keep it between 300-325°F. This heat breaks down the meat without drying it out.
- Preheat your Dutch oven before adding meat
- Use a consistent, low temperature
- Check internal meat temperature periodically
Liquid Ratios for Maximum Flavor
Choosing the right liquid is key for a flavorful beef shoulder. Cover about one-third to one-half of the meat with liquid. Use beef stock, red wine, or a mix.
Precise Cooking Times
Cooking times for beef shoulder are usually 3 to 3.5 hours. The goal is to get the meat fall-apart tender. Use a fork to check if it’s done – it should pull apart easily.
| Meat Weight | Approximate Cooking Time | Recommended Temperature |
|---|---|---|
| 2-3 lbs | 3 hours | 325°F |
| 3-4 lbs | 3.5 hours | 315°F |
Every beef shoulder is different. Trust your instincts and use these tips as a guide. They’ll help you make a delicious, tender roast.
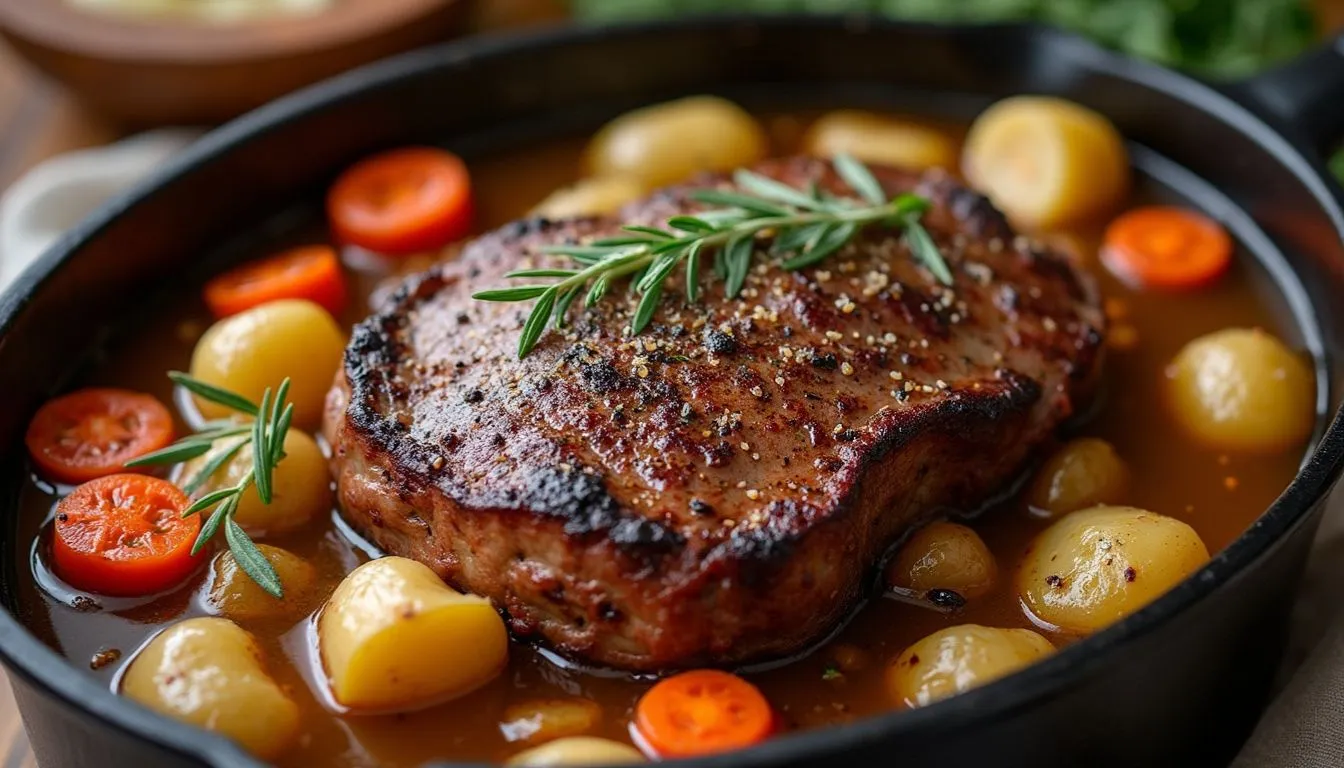
Adding Aromatics and Vegetables
Turn your beef shoulder roast recipe into a full meal by adding vegetables and aromatics. The right mix can make an easy beef dinner truly special.
Choosing the right vegetables is key. Pick sturdy root veggies that cook well and match the beef’s flavor:
- Carrots: Sweet and sturdy
- Potatoes: Creamy and substantial
- Onions: Adds depth and complexity
- Parsnips: Subtle nutty flavor
When adding veggies, timing is everything. Pro tip: Put in big veggie chunks about an hour before the roast is done. This way, they stay tender and don’t fall apart.
Aromatic herbs can really boost your beef dinner. Fresh rosemary, thyme, and bay leaves add amazing flavor. Sprinkle them on during the last hour for the best taste.
For the best results, cut veggies into big, even pieces. Go for 2-3 inch chunks that keep their shape while cooking. This makes your meal look great and taste perfect.
Creating Rich Pan Gravy
Turning your beef shoulder roast into a memorable meal starts with making pan gravy. The drippings in your roasting pan are like liquid gold. They help create a flavorful sauce that makes your tender beef roast recipes even better.
Deglazing Secrets
Deglazing is the secret to rich flavors in your gravy. After taking out the roast, heat the pan over medium. Then, add a bit of liquid to get those caramelized bits from the bottom.
- Use wine, broth, or water for deglazing
- Scrape the pan with a wooden spoon
- Collect all the flavorful browned bits
Gravy Thickening Techniques
Getting the right gravy consistency is key for your beef shoulder roast recipe. You can thicken your sauce in several ways:
| Thickening Method | Ratio | Technique |
|---|---|---|
| Cornstarch | 1 TBSP per 1 cup liquid | Mix with cold water before adding |
| All-Purpose Flour | 2 TBSP per 1 cup liquid | Create a roux by cooking flour in fat |
| Reduction | Simmer until desired thickness | No additional thickeners needed |
For tender beef roast recipes, pick a thickening method that fits your cooking style. Pro tip: Whisk constantly to avoid lumps. This will give you a smooth, velvety gravy that will wow your dinner guests.
Resting and Serving Suggestions
Creating a perfect easy beef shoulder dinner goes beyond cooking. The resting phase is key for a memorable dish. After cooking, let the roast rest for 15-20 minutes. This step helps the juices spread evenly, making each slice juicy and full of flavor.
Carving your roast needs care and precision. Here’s how to do it right:
- Use a sharp carving knife with a long, thin blade
- Cut against the grain for maximum tenderness
- Slice uniformly, creating pieces about 1/4 to 1/2 inch thick
- Angle the knife slightly to create elegant, even cuts
For a stunning presentation, place your sliced beef on a warm platter. Drizzle some pan juices over it to keep it moist and flavorful. Add fresh herbs like rosemary or thyme for a touch of elegance.
Storing leftovers is easy. Put the remaining roast in an airtight container with its juices. Refrigerate it right away and eat it within 3-4 days. When reheating, use low heat to keep the roast moist.
Wine Pairing and Side Dishes
Improving your beef shoulder roast recipe is more than just cooking. The right wine and side dishes can make it unforgettable. It’s all about matching flavors and ingredients.
Complementary Wines
Finding the perfect wine can boost your beef shoulder roast’s taste. Red wines with strong flavors are best for this hearty dish.
- Cabernet Sauvignon: Bold and full-bodied, perfect for cutting through the meat’s richness
- Syrah/Shiraz: Offers peppery notes that complement the roast’s seasoning
- Malbec: Smooth texture with dark fruit undertones
Classic Side Dishes
Pair your beef shoulder roast with these traditional and tasty sides. They make a complete one-pot meal.
| Side Dish | Preparation | Flavor Profile |
|---|---|---|
| Roasted Russet Potatoes | Cubed and seasoned with herbs | Crispy exterior, soft interior |
| Glazed Carrots | Honey and thyme roasted | Sweet and aromatic |
| Caramelized Onions | Slow-cooked until golden | Rich and sweet undertones |
Turn your easy beef shoulder dinner into a gourmet meal with the right wines and sides. Try these ideas to find your favorite pairings.
Storage and Leftover Ideas
After enjoying your delicious beef shoulder roast recipe, you’ll want to preserve those succulent flavors for future meals. Proper storage is key to maintaining the quality of your easy beef shoulder dinner leftovers.
Refrigeration Techniques
Store your leftover roast in an airtight container within 2 hours of cooking. Keep the meat in its cooking juices to prevent drying out. Refrigerated beef shoulder roast will stay fresh for 3-4 days when properly sealed.
Freezing Your Roast
- Use freezer-safe containers or heavy-duty freezer bags
- Include some cooking liquid to prevent freezer burn
- Label containers with the date of storage
- Freeze for up to 3 months
Creative Leftover Recipes
Transform your beef shoulder roast into exciting new dishes that keep your family excited about dinner:
- Shredded beef tacos
- Hearty beef shepherd’s pie
- Roast beef sandwiches
- Beef hash for breakfast
Reheating Tips
When reheating your beef shoulder roast, use low temperatures to retain moisture. Cover the meat with foil and warm in the oven at 325°F until heated through. For best results, add a splash of beef broth to keep the meat tender and juicy.
Conclusion
Your journey to making a delicious beef shoulder roast recipe is complete. This recipe is more than just food; it’s a special experience. It turns a simple dinner into something amazing.
Learning each step is key to success. Choosing the right cut and using slow cooking makes your roast a hit. Patience and detail make your dish stand out.
Try new seasonings, marinades, and sides to make it your own. This recipe works for big groups or small dinners. Your skills will make a meal that wows everyone.
See cooking as an art and let your creativity flow. With practice and passion, you’ll make meals that warm the heart and satisfy the soul.
Tried Our Recipe Yet?
There are no reviews yet. Be the first one to write one.